
Author’s note: Although this article deals specifically with an older Saab alternator conversion, the identical concept applies to any vehicle of similar vintage.
Charging systems for automobiles have come a long way since the ’60’s. Older systems relied on generators, or first-generation alternators to produce current, then a connection was required through a separate voltage regulator to complete the system. All those connections and contact points (regulators) conspired to create constant issues with the system.
Then GM introduced the self-regulating alternator, requiring no separate external regulator, in the form of the now-ubiquitous Delco 10SI and later 12SI alternators.
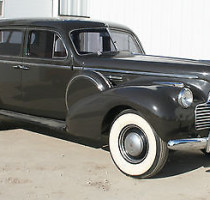
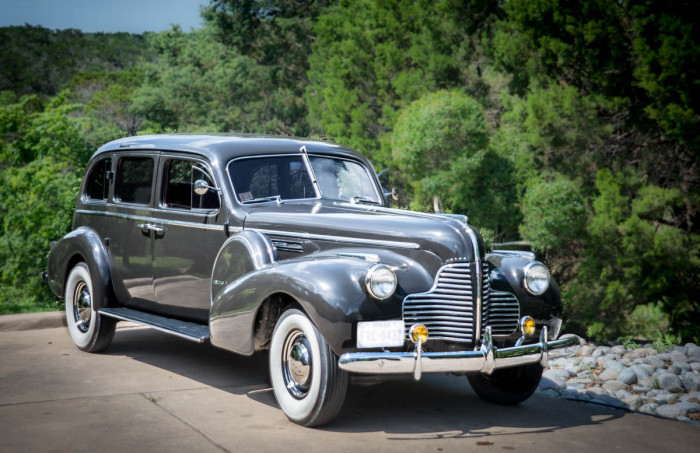
So when recently the charging system in my venerable 1967 Saab Model 96 decided to take a powder, I was faced with the decision of spending a likely $150+ or so to rebuild my stock alternator (with a distinct likelihood of finding issues with the regulator as well), or just converting over to an inexpensive Delco 10SI alternator, eliminating the external regulator altogether. Given that I had a couple of serviceable Delco-style alternators laying around the shop, and my waning interest in maintaining strict originality with my car, I opted for the “function before form” choice of the Delco “upgrade”.
As a bit of a primer, there are two styles of Delco self-regulating alternators available: The so-called 1-wire (just hook up the alternator direct to the battery and go), and the 3-wire configuration. The 1-wire can be tempting, but I have always opted for the 3-wire setup, as it allows provision for an alternator charge warning light circuit without further alteration.
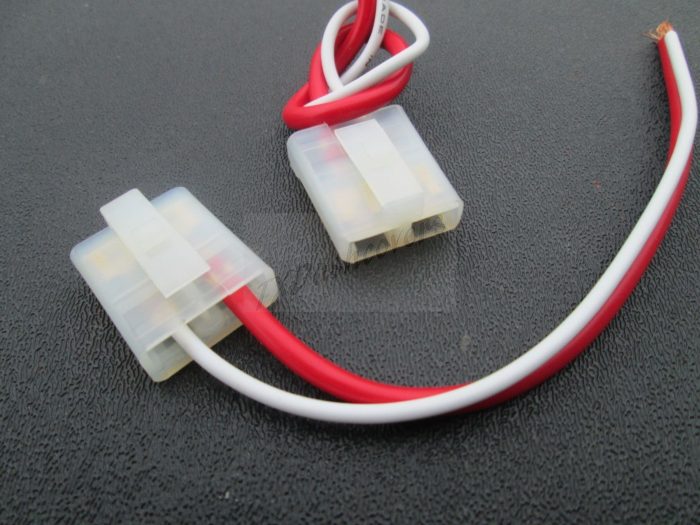
The 3-wire unit consists of a central single terminal post which is connected directly (or indirectly) to the battery. The remaining 2 wires are in the form of a 2-pin connector, which needs to be sourced for use with these alternators. Most any local parts store will carry these generic connectors. I bought mine at an O-Reilly’s for about $3:
If you need to purchase an alternator new, you will find them everywhere for about $75 or less, usually with free shipping. Of course, if buying from your local parts emporium, the genius behind the counter will want to know which car year and model, so you will have to exert a lot of pressure to get them to just open a few boxes until you get what you need.
The good news is all Delco 10si and 12si style alternators seem to have exactly the same mounting dimensions, so fitment shouldn’t be an issue. When purchasing, pay attention to the alternator “clocking”.. i.e., what position on the outer case will the 2-pin connector plug in. Although for the Saab, any one of the 4 clocking positions (12:00, 3:00, 6:00 or 9:00) will be workable, the best choice of a 9:00 clocking will position that plug right on the top of the alternator for easiest access:

The first step in working with any alternator installation is, of course, disconnecting the negative terminal of the battery for safety sake.
For the Saab-specific installation, there is a 3-wire plug-in connector at the OEM alternator which goes right to the 3-pin connector on the fender-wall-mounted regulator. I just unplugged that cable at both ends and tossed it in the spare parts bin (you know, those parts you will NEVER use again!)
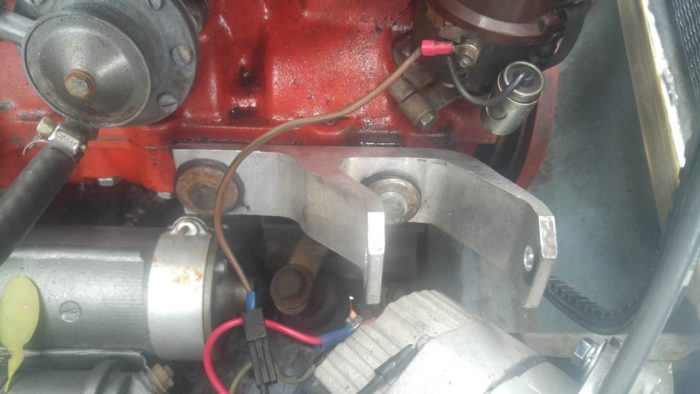
Next, I removed the larger gauge (estimated 10 ga.) wire from the alternator which connects right to the larger post on the starter. There is another larger gauge grey wire attached to a second terminal on the alternator. This is the main feed to the fuse block unswitched power buss. The Saab manual’s wiring diagram shows this cable being connected directly to the large terminal on the starter (along with the previously mentioned wire to the alternator), so I followed that guidance, and connected both of those wires to the starter terminal.
A final connection on the Saab alternator was a black ground wire, attached to one of the case through-bolts. The Delco alternators typically don’t have a provision for a ground wire, under the assumption that the alternator will be properly grounded through its mountings. But since the lower block mount is isolated via rubber (see below), a ground-specific wire to the alternator seems like a good idea.
My own Saab never had an operating alternator charge warning light (that’s why I had to discover my alternator’s failure when the car wouldn’t start one day!). I found a small gauge (estimate 16 ga.) wire that some previous owner had just cut and left dangling from the wire bundle under the regulator. Since that color corresponded to the factory wiring diagram for the charge light, I surmised that wire led directly to the dash light. More about this later.
After removing the old alternator from the car, I could now turn my attention to fitment of the new(ish) Delco replacement.
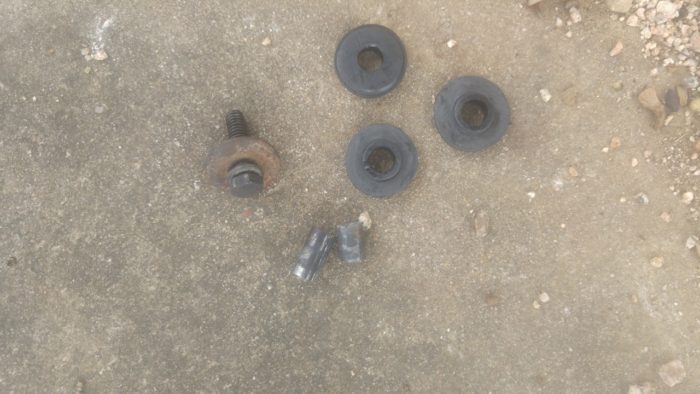
The first issue was discovering that the beautifully crafted aluminum alternator mount is attached to the engine block through a pair of vibration damping (presumably) rubber fittings:
The problem is, there is a metal sleeve in the center of each of those rubber grommets. Overtime, the rubber has shrunken so that the attaching bolts bottom out on those metal sleeves before the bracket itself gets firmly connected to the block, leaving a very wobbly situation. I resolve that by using an angle grinder to whack off about 3/16″ of the length of each sleeve before reinstalling:
However, before reinstalling the alternator mount back to the block, there is another issue that must be resolved: It turns out that the lower, wider mount on the Delco alternator is drilled to accommodate a 3/8″ diameter mount bolt, while the original Saab alternator (and associated holes in the mount bracket) is set up for a 5/16 bolt. Something had to give so that the lower mount would be tight and wiggle-free. I opted to just drill out the 2 mount holes in the aluminum original mount bracket to 3/8″, thus accommodating a 3/8″ bolt for a snug fit.
Additionally, I found that the new Delco lower mount tab was about 1/4″ narrower than the Saab, so I had to add spacer washers on each side when installing the alternator to the engine:
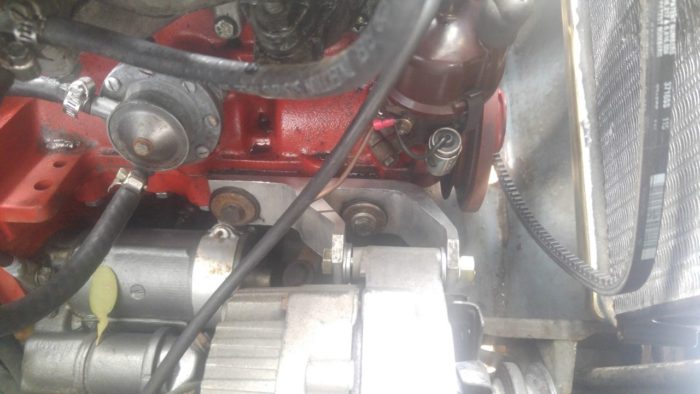
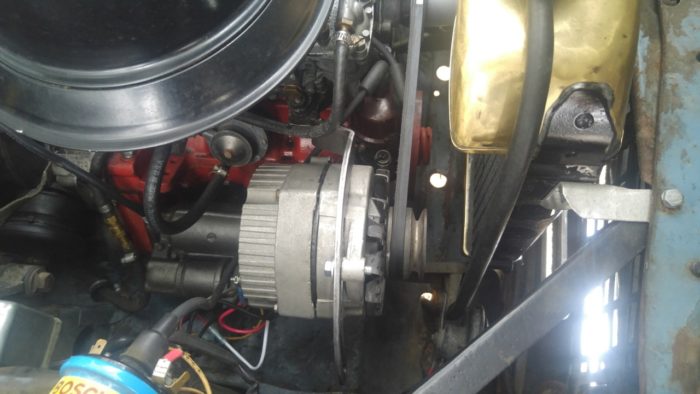
Now with the new alternator firmly installed in its new home, I was pleased to see that the pulley lined up perfectly without any modification to either the upper or lower mount:
It is time to attend to the wiring.
A generic wiring diagram for the Delco 10si is shown below:
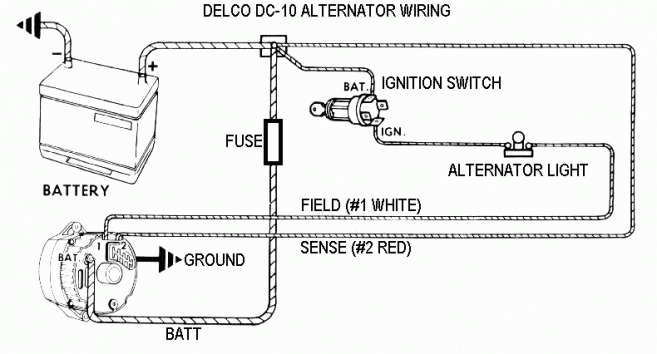
Note that the rectangle junction depicted just underneath the DC-10 title represents the large terminal on the starter motor.
You can see the connections are pretty simple. For the Saab-specific installation, make the following connections:
- Connect the grey wire from the alternator power post to the starter post
- Additionally, crimp a ring terminal onto the RED wire of the new 2-pin connector you bought, and attach that terminal right along with the grey wire described above, to the alternator power post. This red wire connection is where the alternator gets its “voltage sense”.. i.e., it measures the battery voltage from here and uses that reading to engage or disengage the internal charging regulator. For installations with the alternator further from the battery, it is advised to run this wire (the red wire) directly to the battery, so that true sensing of the battery voltage itself is measured. For this installation, it will work just fine by connecting it to the main alternator power post.
- The white wire from the 2-pin connector is what powers the alternator charge light. When the alternator is at rest, this wire becomes ground, and completes the power circuit from the light to illuminate it. Once the alternator begins charging, this wire becomes a positive voltage, thereby negating a circuit for the charge light.
- Temporarily unscrew one of the through-case screws on the alternator, and reinstall it while capturing the black ground wire terminal as from the original installation.
That is all there is to it! These instructions are equally applicable to vehicles original equipped with a generator (you can even buy a 6 volt alternator if appropriate), and in any case, following the simple connections as described, while abandoning/removing wiring from the regulator, will give the desired results. For those with generator installations, there are plenty of generator-to-alternator adjustable mounting brackets to be had with a simple Google search.
To test your new alternator installation, with the engine running, just attach a voltmeter to the negative and positive terminals on the battery. A good alternator should output 13+ volts at idle rpm, and should jump to 14 – 14.5 volts with the engine revved up.
Read More


Social Profiles