If you follow this blog, most likely you personally perform some maintenance and/or repairs on your prized vehicle.
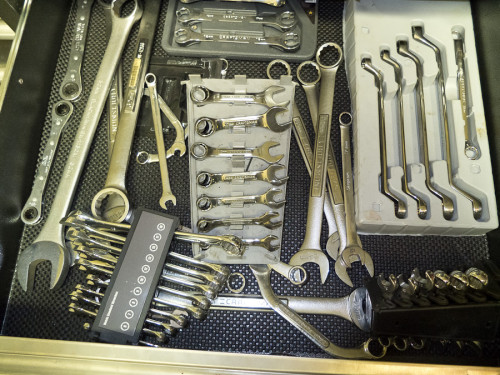
Sure, most of us car guys aren’t professional mechanics, but we do enjoy occasionally turning a wrench in the garage. There is a collection of tools I have found over the years to be essential for the complete mechanic:
Leatherman “Juice” S2 Multitool

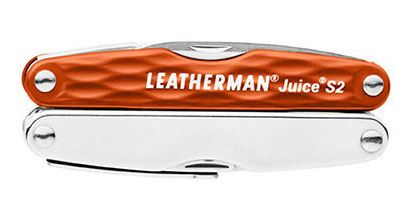
This tool deserves the top of the list, as it is the one single tool that I use every single day at the shop.
Oh, I know there are scores of pocket multitool gadgets on the market, some including such must-have features as built-in fork and spoon, or magnifying glass. And, believe me, I’ve tried most all of them.. in fact, the back corner of my toolbox drawer seems to be the final resting place for myriad pocket tools I’ve tried then rejected. Most of these fancy versions are just too big and bulky for regular carry in your pocket, and many contain “tools” that are absolutely useless for any real task.
The Juice S2, in my mind, is THE pocket tool for a home mechanic. I always carry one in my pocket, and would feel more naked without my cellphone than without my trusty Juice in hand. In fact, my concern that Leatherman might eventually drop this model has prompted me to acquire no fewer than SIX of these identical tools, as I plan to be equipped for a lifetime!
What is so great about the Juice S2 (be forewarned, there ARE other iterations of the Juice model.. the S2 is the baby you want)? First, there are no extraneous tools taking up valuable space in your pocket. No file, mini saw, or toothpicks. Only the exact tools you would use virtually every day are included on this tool:
A strong and precise needle nose pliers/wire cutter (This is so good, when I need such a plier, I just instinctively reach in my pocket, rather than a toolbox drawer
One sharp knife blade (why would you need more?)
A very high quality phillips screwdriver, and 3 flat blade screwdrivers, tips of quality that will rival anything in your toolbox (the smallest blade can remove screws from your glasses, as well as work on other precise applications)
A small scissors, that cut surprisingly well (I’ve even cut new gaskets with these scissors without struggling)
A can and bottle opener (for when beer-thirty arrives at the shop)
This little tool has saved my bacon on more occasions than I can remember. I do remember one afternoon I was driving my classic Jaguar MK IX toward an important meeting, and running a little late. As I drove down the road, suddenly a loud howling noise emanated from under the dash. I then noted the tachometer needle was bouncing crazily, so guessed there was an issue with the tachometer drive cable. I didn’t think I had time to pull off the road and make my meeting in time, so while steering the car, (kids, don’t try this at home.. feat performed by a professional driver!) I slipped my leatherman out of my pocket, opened the screwdriver, removed the dash underpanel screws, reached up under the dash, unscrewed the tach drive cable, and proceeded on my way without further incident!
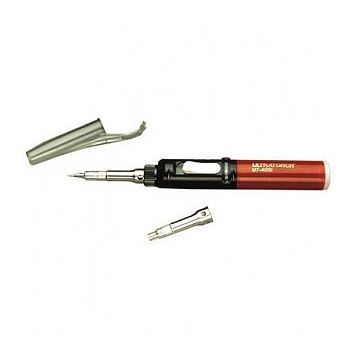
Master Appliance Ultra Torch Butane (UT-40SI)
Maintaining and repairing a classic vehicle means that eventually the owner will be replacing or modifying some of the electrical wiring of the car. I do hope none of you out there has ever used those plastic wire “nuts”, designed for use with static household wiring, to join wires together in your vehicle!
Crimp connectors can work pretty well, if installed with the correct tool (see next discussion). But, for a connection that will last permanently, there is really no substitute for soldering the wires together, followed by insulation with heat-shrink tubing.
The Ultra Torch butane soldering tool has been around for years, and is one of the few items still manufactured right here in the good old U S of A. I always keep one of these tools in my electrical tool box (along with a spare butane refill canister). The Ultratorch is not cheap, and I have had reliability issues from time to time, but I have yet to find a suitable substitute for this wonderful little tool. It features a built-in self ignitor, and can heat up to soldering temperature in literally 30 seconds or so. Of course, it is ultimately portable, so it can be used anywhere you need to perform a soldering job.
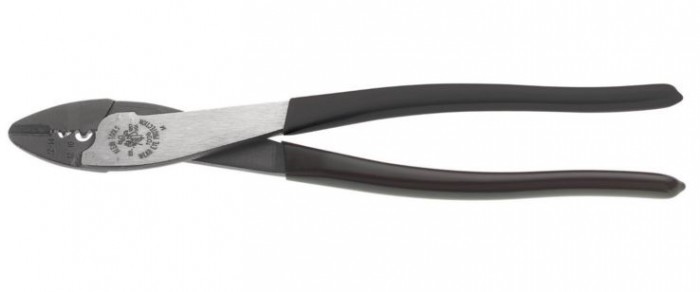
Insulated Terminal Crimping Tool
Do yourself a favor. If you have one of those cheesy combination stripper crimper tools that came with your insulated connector assortment:
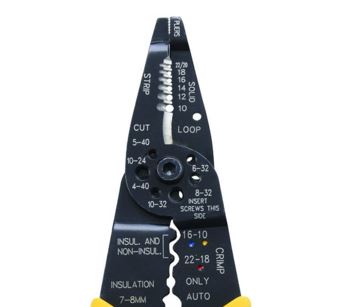
Take it out of your toolbox, and toss it in the trash. The “crimper” function of these cheapy tools are notoriously ineffective, and will certainly result in wiring frustrations for you down the road.
I generally prefer soldered and heat-shrinked connections over crimped, but for some applications, the crimped connector is the only viable choice. Spending a few more dollars for a quality crimper tool, such as a Klein ($30 or so) will save you hours of grief in the future!
MIG Welder
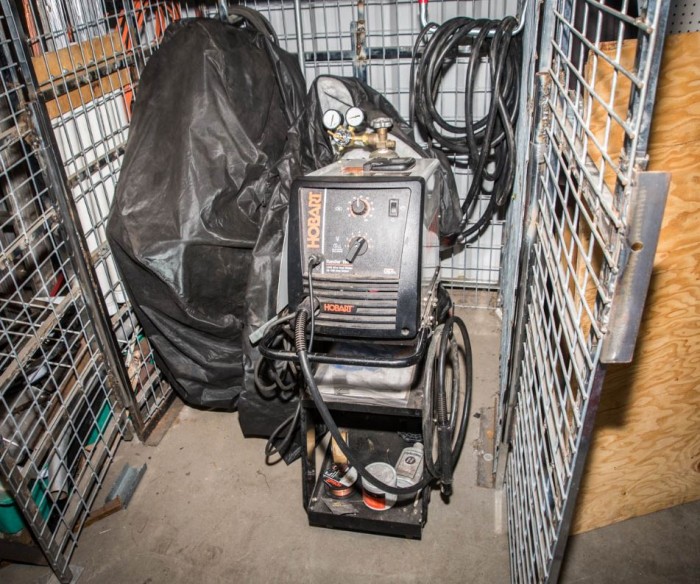
A MIG welder has been a standard shop tool for several decades. If you have never used a MIG welder before, you may feel that (1) using a MIG requires lots of experience, and (2) a welder is mostly for building trailers or fences. You’d be wrong on both counts.
The MIG (Metal Inert Gas) is hands down the easiest type of welder to use and obtain good results (as compared to “stick” or Arc welding, TIG welding, or gas/oxygen welding). A MIG features a motor driven spool of filler/electrode wire which travels through the welder “cable/hose” to emerge at the tip. Argon gas travels through the same hose/cable to envelop the weld area and shield it from oxygen, which would otherwise react to the hot weld metal and create porous craters in the work.
Sure, like any skill, practice makes perfect, but these wonderful machines do not require rocket scientists to operate.
Just refer to the manufacturer-supplied charts to determine the correct settings for the thickness of metal you’ll be welding. It is always best to do a few practice welds on like scrap material to dial in the settings for perfect results.
A MIG can weld regular steel, stainless (using stainless weld wire) and even aluminum (the softer aluminum wire requires a special spool gun attachment at the welding gun, so the wire doesn’t have to be pushed through a long hose).
Once set up, when the trigger on the gun is pressed, 3 things occur simultaneously:
1) DC electricity at the desired amperage is sent through the tip (via the welding wire)
2) The machine begins pushing the weld wire through the gun at the rate set on the panel
3) A valve opens sending Argon gas through the tip, to shield the weld area from oxidation
MIG welders aren’t cheap, but a good name brand will last a lifetime, and open up amazing possibilities for the average home shop.
I strongly encourage anyone considering a MIG to AVOID the temptation of buying one of those “no-gas-required” or so-called “flux wire” welders (typically from Harbor Freight). Instead of having an Argon gas transport system, these cheaper units require use of flux covered welding wire, which, in theory, creates its own shielding gas when heated by the weld process. Usually these are set up to run on 110V, meaning limited maximum amperage. My own experience is that the weld quality and capacity of these gasless welders is marginal at best. Just spend a few hundred dollars more to get a welder that will do the job. And, this is one of those areas where sticking with a name brand unit (Miller, Hobart, Lincoln) will pay off in the long run, especially when you go to replace consumables.
But don’t be fooled into thinking that purchase of the welder itself will be your only expense. Although the hose and regulator/gauges will generally come with a good welder, you will need the compressed gas bottle (don’t buy anything smaller than an 80 cu. ft. bottle); some sort of a welder cart to hold the machine, gas bottle, and supplies; a welding helmet (auto darkening is a must); gloves, and one of those special welding pliers to cut the wire and to clean slag from the tip from time to time. Finally, you will need a 220V outlet in your garage (don’t worry, virtually every home built in the last 30 years has 220V service, at least to the main panel).
Of course a MIG is great to construct items made of metal. However, I more frequently use my welder for quick repairs or fabrications to accomplish a sometimes unrelated task. For example, the welder works great to remove broken studs from an engine block (or anything else). Just drop a grade 8 nut over the remaining stub of the broken stud, and then weld the hell out of the center of the nut. This secures the nut to the stud, and has the added advantage of heating up the stud to help loosen it from the block. Then just use a wrench on the nut to remove.
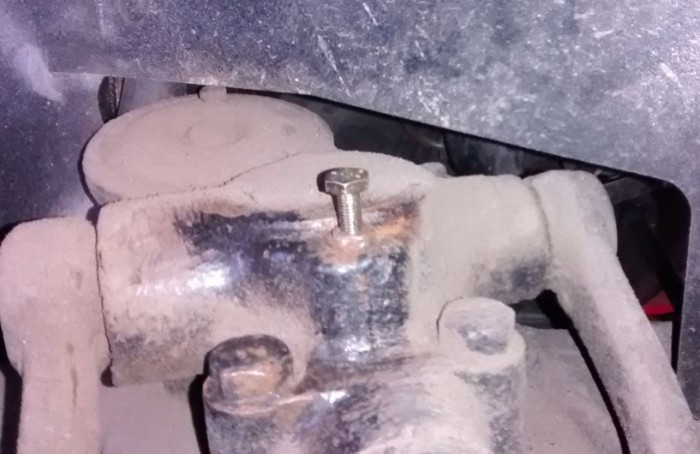
A month or so ago, I was trying to remove the filler plug from the lever action shocks on my ’40 Buick. Unfortunately, some previous “expert” had tried to use a pair of vice grips to remove the plug, and had rounded off the edges to the point that nothing would work to remove it. I dropped a nut over the end of the old plug, then welded a new, grade 8 short bolt to the old one, then I was easily able to remove the filler plug with an ordinary wrench:
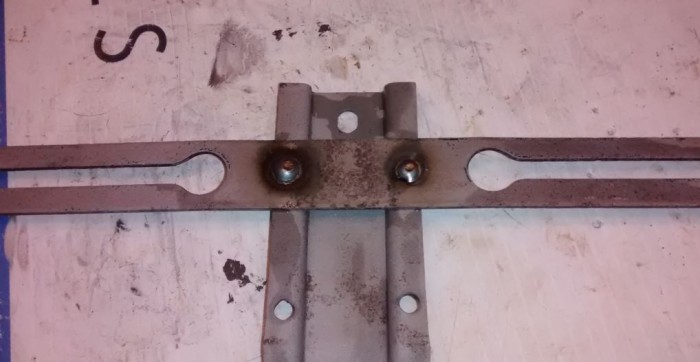
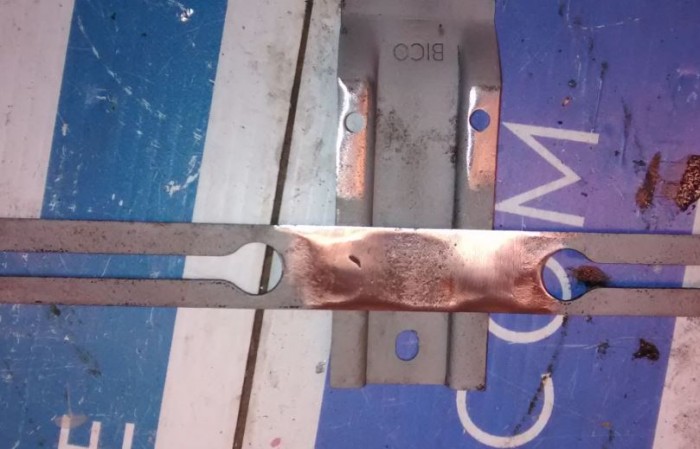
I used the welder again to “plug weld” (poor man’s version of spot weld) a repositioned license plate holder prior to having it chrome plated:
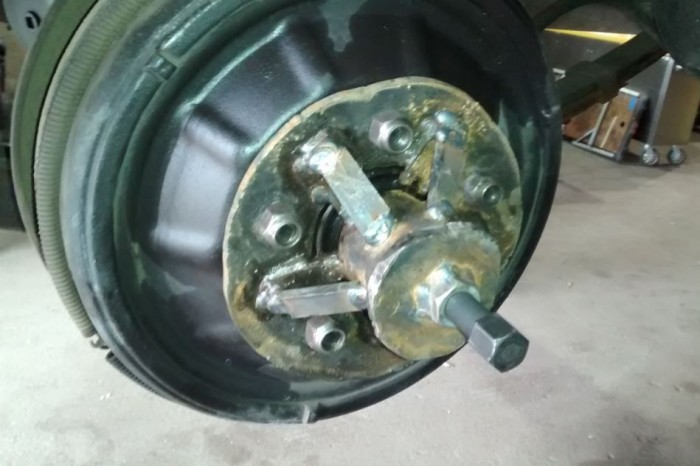
Most recently, I was removing the rear brake drum from my 1940 Cadillac 60 Special in preparation for replacing the rear axle bearings and seals. These older cars employed a tapered axle shaft-to-drum configuration, and after sitting without removal for years can be real buggers to remove. I searched unsuccessfully for a commercially available drum puller that could accommodate the Caddy’s brake drum.
Finally, I just broke down and fabricated my own using 1/4″ plate steel, some 3″ diameter pipe, and a large Grade 8 nut. Having that welder made short work of the project, and, while not a work of art, the tool did its job, and now resides in my toolbox to be used another day!
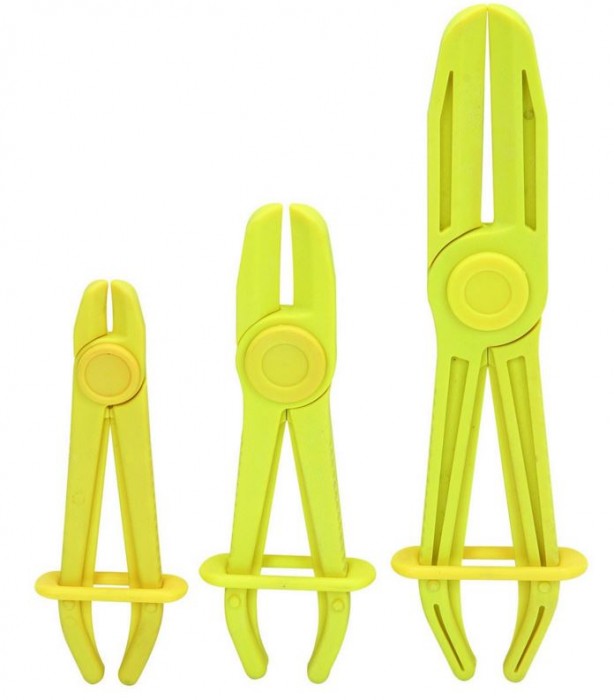
Hose Line Clamps
Here is a tool you never knew you needed UNTIL you DO need it! These are used for temporarily cutting off flow of liquids through a hose.. such as when you are removing a fuel line, and don’t want gasoline to spill all over the floor. A set like this is under $20 at Harbor Freight, and they are so much more effective than trying to clamp off a hose with a pair of vice grips (probability of damage). A great little tool to have stashed in the back corner drawer of your tool box!
Stud Remover Set
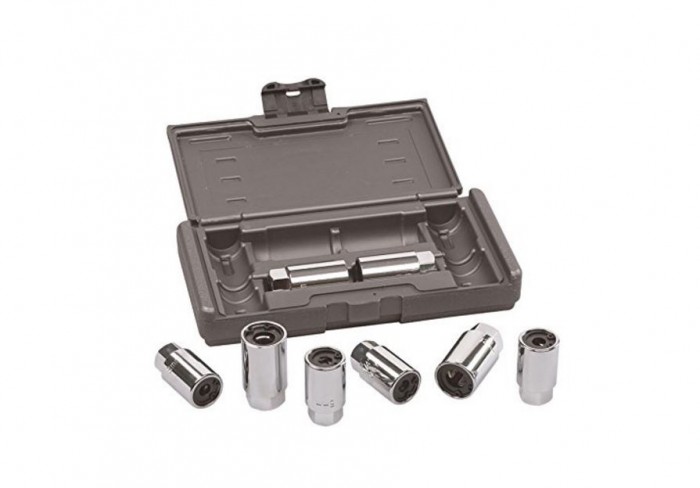
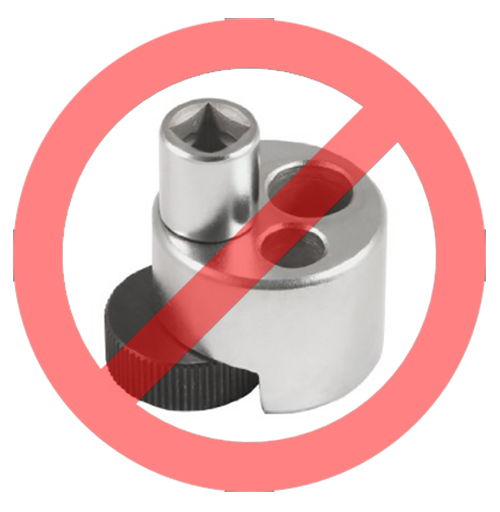
Don’t waste your money on those cheap one-size-fits all “universal” stud remover such as the one pictured below. They might remove an “easy” stud, but for the tough ones, you are just going to bugger up the stud and then be unable to remove it, even with a proper tool. Spend the extra $25 on a set designed with individual removers for each specific stud diameter, and you won’t be disappointed. This is another tool that won’t be used daily, but when you need it, there is just no substitute!
Angle Grinder/Cut off
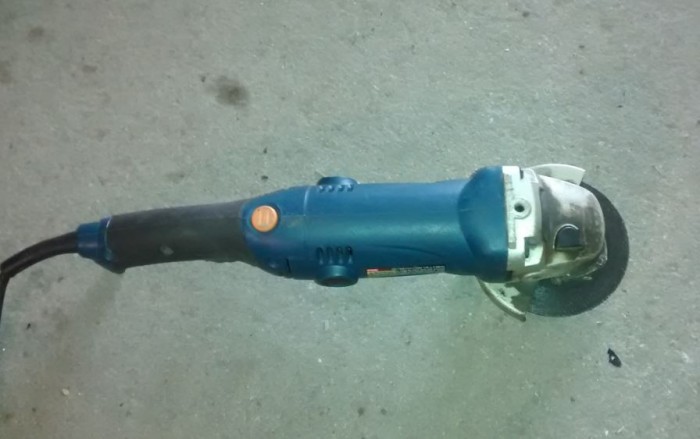
No garage or shop is complete without an angle grinder. We keep several at our shop and they are used almost daily for cutting and grinding. The 4 1/2″ cutting discs are most popular and readily available, so that would be the recommended tool. These are inexpensive, and are invaluable when working around metal.
Just one caveat: Choose a model with a trigger switch that does NOT have a locking ON feature. Why? Just Google “Angle Grinder accidents” and learn how many people have lost fingers, hands, even arms, when a grinder locked in the ON position got away from them and tore across the shop. Use of this tool is not to be taken lightly. A wise user always wears gloves and a full face shield!
Pneumatic Angle Tool
You DO have an air compressor in your shop, no? Then you need at least one 3″ air-driven angle tool:
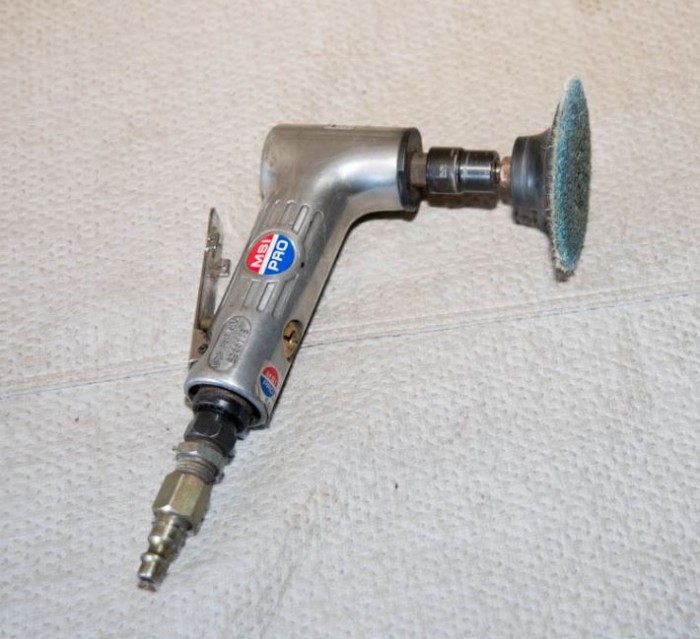
The smaller diameter head allows getting into to tighter areas. The 1/4″ drive collet adapts to many fixtures, such as the 3M Roloc Scotch-Brite pad and abrasive disc as shown above. These discs come in a variety of courseness, and are great for removing rust, polishing metal, and a variety of other uses.
Air conditioning service gauges and manifold
How much did you pay to have the refrigerant level in the car’s A/C system last topped off? I’d guess it was way more than the cost of the equipment to do the job yourself.
A good set of quality A/C service gauges can be had for well under $100:
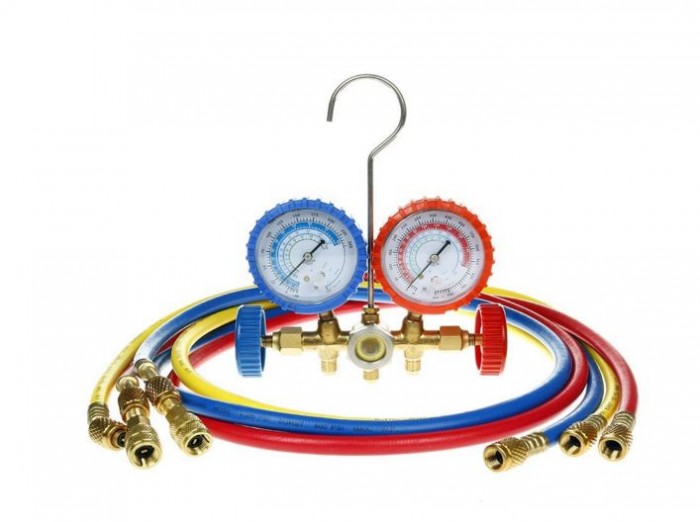
Replenishing your A/C’s refrigerant is a pretty simple process, and there are scores of clear instruction sets and videos to be had with a quick Google search. DON’T be taken in by those single gauge “kits” connected to a single can of refrigerant that are so prominently displayed in most every auto parts store. You CANNOT properly determine the correct amount of refrigerant to add without a gauge for the high pressure side of the system (as provided in a true service gauge/manifold set such as pictured above). Those little quicky parts store kits do not have provision to measure the high pressure side. I guess they rely on the premise that you can’t do serious damage to the system with the single 12 oz. can of refrigerant that comes with the kit.
In addition to the manifold set (available on Amazon, and most any parts store), you will need a can “tap” to connect the gauge/hose set to a standard can of refrigerant. Note there are several different thread configurations for those taps, so make sure you purchase one that fits the hose set you have. OR, spring for a lifetime-supply 30 lb pressurized bottle of refrigerant (R-134 about $130 or less) and the manifold hose set will screw right into the bottle without any other adapters.
Coolant Leak Tester
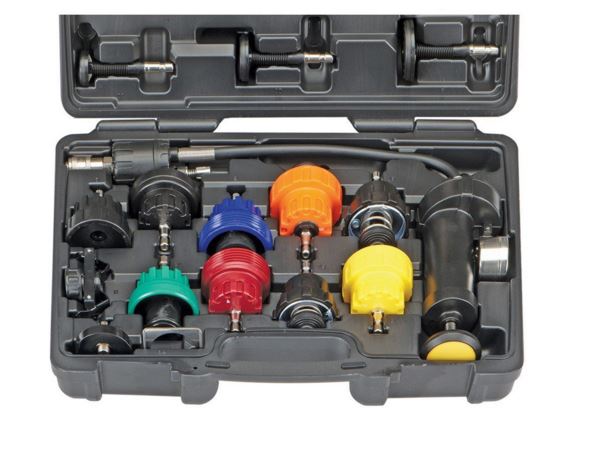
Sooner or later, one of your vehicles is going to develop a leak in the coolant system. Frequently, the leak only occurs after the system has warmed up enough to create pressure. Ignoring a slight leak can lead to disaster down the road, when a component finally completely fails.
A coolant leak test kit comes with a variety of different radiator filler cap adapters, as well as a manual air pump to pressurize a cold coolant system, emulating conditions that would occur under normal operation. Just choose the correct adapter to fit your filler cap, pump up the pressure (a gauge is included to set the correct pressure) to near the maximum pressure of your cap (usually somewhere between 9 and 15 PSI).
Then just sit back and watch for coolant dripping from underneath the car, then follow that back to the source.




I really need to learn how to weld.
Until then, I can definitely buy some rubber tube clamps and that angle grinder I have been putting off forever. Pretty much everything else I have in one form or another.