There is hardly a classic car out there which doesn’t cry out for some sort of paint work. It seems that interiors, if well cared for, can last for decades without issue, and even mechanical items, especially for a low mileage car, can retain their youth far into the future.
Not so with exterior automotive paint. Of course, the paint on a car is most exposed to the elements, and so is more susceptible to degradation. Even for cars carefully stored indoors however, paint just seems to have its own life span, measured in years, not decades.
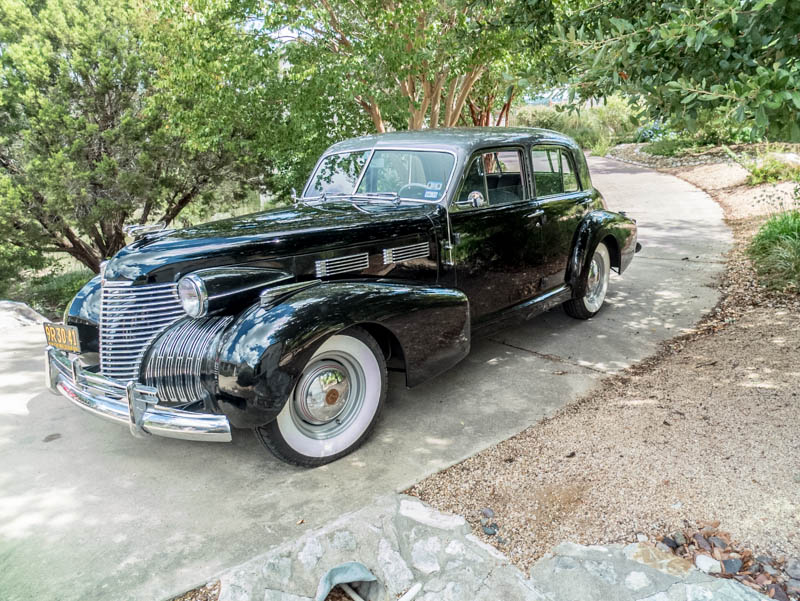
So it was with my venerable 1940 Cadillac Fleetwood Sixty Special sedan (nicknamed “General MacArthur”). A beautiful car, with pristine interior, and robust mechanicals, but the roof and fenders were beginning to look a bit long in the tooth.. paint cracking and flaking, etc. We use this car with our Classic Limousine service, so it is not feasible to have the car out of service for extended periods of time. In respect to our scheduling constraints, it seemed unlikely to rely on a commercial shop to complete the job on time.
The scope of this project was extensive. The roof paint had deteriorated to the point that there was extensive flaking and cracking, mandating that the old paint be removed right down to bare metal. Of course, those $$%&@#** front and rear windshield/windows presented a problem, as no proper paint job could be completed without removing both (5 pieces of glass in all… 2 for the front windshield, and 3 for the rear window).
Given our time constraints, I decided to tackle the job myself (The exorbitant fees the good shops charge these days posed an additional contributing factor to my decision). I’ve done a good bit of spray painting in the past, but much of my experience has been painting small airplanes… scuff up the existing paint, spray a coat of primer, then one coat of color and call it done. The Caddy was of such elegance that a more proper show-car preparation and finish would be required.
With some guidance from a local professional restoration shop owner, and special help from an online Auto Painting How-To course (more about this amazing company in a separate post), I removed the “General” from the schedule for a 4 week running period, rolled up my sleeves, and began the process.
The first step involved removing all the windows. Naturally, on a 70 year old car, many of the window frame attachment screws were rusted to the extent that they broke off or stripped out during removal, requiring extra time to drill out the remainder. And, the old glass itself was beginning to cloud, and the rubber gaskets were hard as a rock. Fortunately, all the glass in this car is flat pieces, so each went off to a local glass shop for custom cutting and reproduction. New rubber gaskets were obtained from Steele Rubber Products.
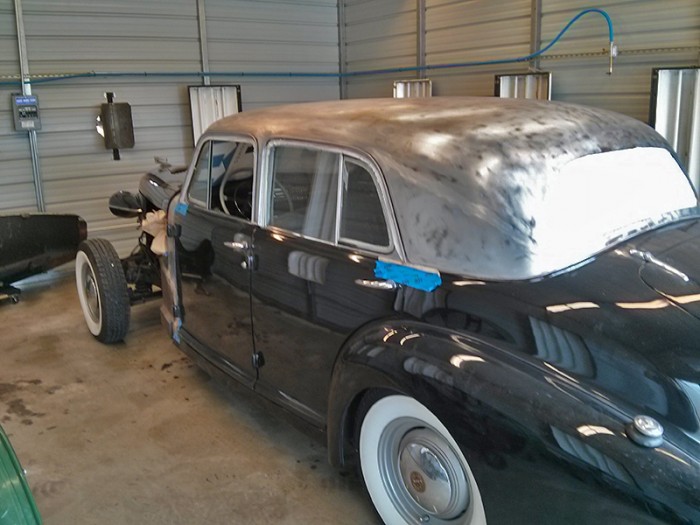
Next began the tedious task of stripping the old layers of paint from the roof. I used an air-powered D/A (dual action) rotary sander, and a big handful of 80 grit self-stick disks. Surprisingly, it only took the better part of two days to remove all the old paint, including the tricky areas around the drip rail. In the photo below showing the stripped-to-bare-metal roof, note the lighter color diagonal stripe on the aft C pillar: This is the area where the roof was apparently joined to the rest of the body at the factory using lead.. I discovered a similar stripe on the other side!
An important word here about spray painting: these modern urethane paints are EXTREMELY toxic. People have actually died inhaling the vapors of this stuff, so it is not be to taken lightly. I know that even in many professional spray booths you see guys painting with a $25 respirator mask. If anyone has ever used one of those type masks for painting or sanding, you know that at the end of the day, when the mask comes off.. first time you blow your nose you’ll see dust or paint particles that slipped past the mask. Just because the ‘pros’ settle for these minimal protection masks doesn’t make them safe. Remember the pictures from the car factory sites from the 50’s-60’s where even the full time guys in the factory spray booths are working with minimal masks, or sometimes no masks at all? Most of those guys are now dead from lung and respiratory ailments!
At my age, I value my remaining respiratory system, and don’t mind spending a little extra money to protect myself. I’ve chosen The Survival Air Systems Pure Air 2000 “Supplied Air System” At $215, this system takes a small amount of air from your compressor, and provides it to an integrated mask or hood that is ALWAYS under positive pressure, so there is no way that extraneous fumes can enter your mask or breathing tract. An added benefit is the cooling effect of the compressed air, keeping you cool, even in Texas August conditions.
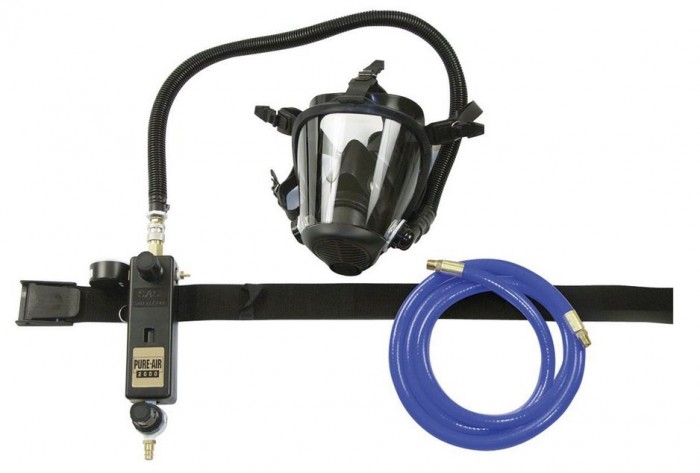
SAS mask system, about $460 from Amazon
The item from the link above is JUST the air regulator mechanism, and you’ll have to add a complimenting hood (about $80-90) or full face mask (as shown below.. about $460 total for the face mask) for the complete system. The face mask system does look more user friendly, but I cheaped out on this and opted for the hood, which has served me well. But believe me, if you use one of these systems once, you’ll be sold on the benefits, and be willing to overlook the expense!
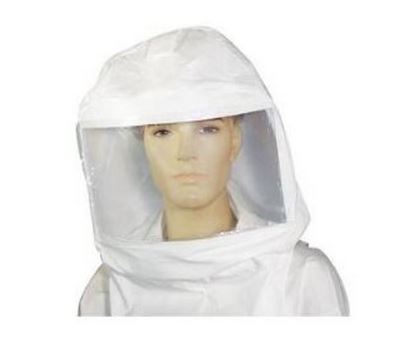
SAS Hood system. About $277 for complete system from Amazon
Next, a note about spray gun equipment. You can easily spend a small fortune on high-end spray guns, or do a reasonably credible job with one of those $30 Harbor Freight specials. I opted for the middle of the road, choosing a recognizable, and respected brand name, Devilbis. I went with a Finish Line gun, which comes in a nice case along with 3 different size spray tips. This will run you between $200-250 but will last forever if you care for it.
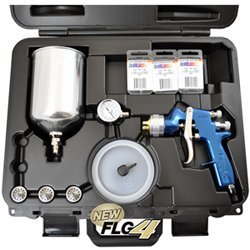
Devilbiss Finish Line Spray Gun – available from Amazon
According to recommendations by other pros in the area, I would up using the 1.3 tip for all the applications, from primer to clear coat, and got great results. This is an HVLP (High Volume, Low Pressure), that requires about 25 PSI pressure going into the gun, but needs about 8 cubic feet per minute air flow, so a pretty robust compressor is mandatory for good results.
Since I would be painting over bare metal, use of epoxy primer was dictated, (after treating the bare metal with a rust-preventative solution). Generally epoxy primer doesn’t sand easily, so it is important to get as smooth a finish as possible. The finish isn’t super critical, since the following 3 coats of primer will allow the opportunity to correct for any deficiencies.
After a day’s drying time, next comes 3 full coats of standard 2-part (paint and catalyst) urethane primer. This primer sands very easily, and it is at this stage that careful preparation is necessary to get the desired finished results. The primer needs to be “blocked” with a long sanding block to reveal any high or low spots in the metal below (to be corrected with a thin layer of “bondo”-style filler). This can easily require several additional applications of primer in spot locations until the surface is perfect. Once happy with the underlayment, the primer is sanded, first with 400 grit, then 600 grit sandpaper, using water to smooth the process.
Now, all the masking paper must be removed and the car carefully washed down to remove any impurities. Likewise, your painting room should be thoroughly washed.. walls and floors, to eliminate as much dust as possible.
Back in the booth, the car gets remasked, then rubbed down with commercial wax and grease remover (don’t be cheap.. use the stuff they sell at the automotive paint suppliers!). Most pros recommend going over the entire surface at LEAST 2 times with the grease remover, using clean rags each time.
Finally, a light ‘sweeping’ with a tack rag just before spraying, to remove that last bit of dust or lint.
Now the fun begins, and you are ready to bring the job home This can all be completed in a single day’s session:
First up is a single coat of ‘sealer’ which will go on nice and smooth over the primer, and shouldn’t require any further sanding or prep afterward. The sealer will be dry and ready for your base coat in about 30 minutes or so.
I had chosen a medium metallic grey paint for the color coat. I’ve been told that using a single-stage paint (vs. base coat/clear coat) is inadvisable for metallic paint, since any appreciable after-painting color sanding can create variegations in the final metallic color. Therefore, subscribing to a base coat/clear coat strategy is the way to go. This was my first experience with Base coat/clear coat. Honestly, I had assumed that using this process was more expensive than single-stage paint, but this is what I learned:
A custom-mixed color (as in my choice) can run well over $100 PER QUART!. If you go single stage, you’ll STILL need to spray at least 3 full coats to allow enough thickness for color sanding and buffing. The clear coat, by contrast, is much less expensive. Additionally, I found that the clear coat just seems to spray on much smoother, is not as affected by overspray, and requires less work at the color sanding stage. After my first experience, I’m sold on the base coat/clear coat process, and will use this exclusively for all my future painting projects.
The base coat is a very thin solution and usually requires 2 coats for full coverage. It must be allowed to fully dry to the touch (15-30 minutes or so), before applying the clear coat. Especially for a metallic base coat (and most other colors as well) you should not expect to be able to sand this prior to the clear coat, so don’t get anxious with the initial coat and wind up with a run. Just a thin initial coat is sufficient to get the ball rolling.
Don’t be too concerned if a few dust spots wind up in the paint, or even if some wandering bug gets stuck. Best to leave it be, and continue on with the final step, which is spraying at least 3 coats of clearcoat on top. Don’t worry, those zits, and even bugs, WILL sand and polish out at the end of the process.. trust me!
Each clear coat should become tacky to the touch before proceeding to the next (obviously you are NOT going to test this on your painted car.. just check an area of the masking paper where paint has been sprayed).
At this point, once the three clear coats have been applied, the painting part of the project is DONE!
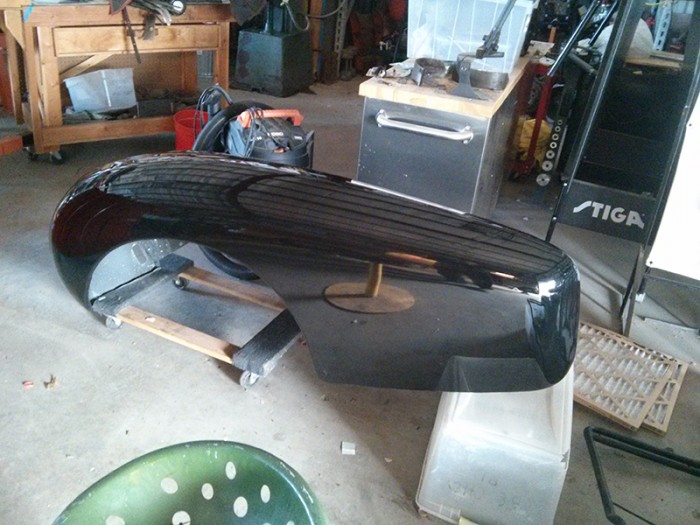
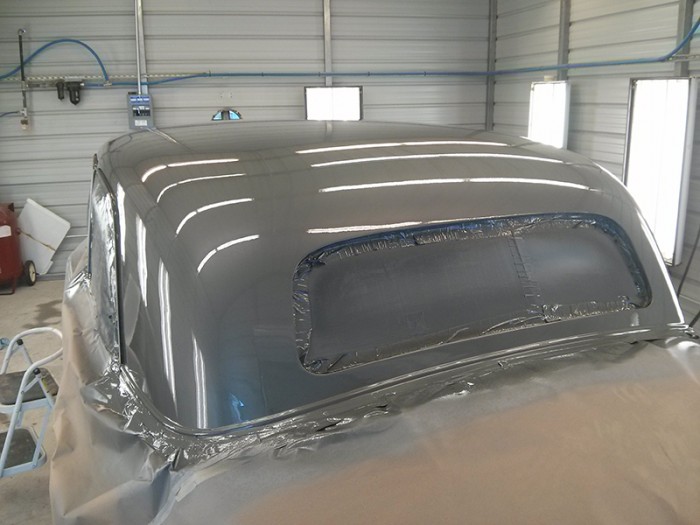
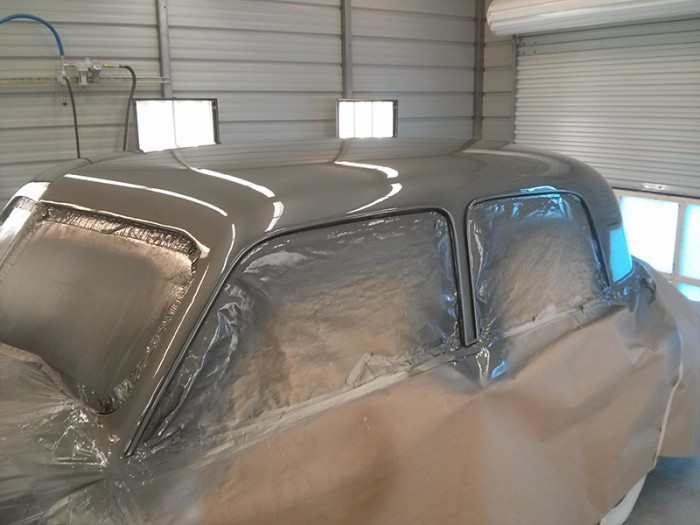
It is at this stage that a “production” spray job will have ended (this includes your new BMW right from the factory). But we are looking for waaay better than “production quality” for our show car. Careful inspection will reveal slight “orange peel” texture in the paint. Acceptable for an every day driver, but we want an absolutely smooth mirror finish on our vehicle. This is going to require color sanding followed by buffing and polishing.
I know, it does seem counterproductive to start with a near-perfect paint job, all shiny and glossy, and then start sanding on it until there is just a dull mat finish, but that is what is necessary to do a quality job.
Wait 24 hours for the clearcoat to set up nicely, and then you are ready for color sanding and buffing. The sanding phase is best done by hand, beginning with 1200-1500 grit wet-sand paper and a small flexible pad. If your clearcoat spray job was exceptional, you might be able to start with 2000 grit. Give it a try.. if it takes too much effort to remove the orange peel, then you can drop down to a more aggressive grit.
This first phase will require the most work. Work on a small area at a time (keeping your sandpaper wet with a plastic container of water and a few drops of liquid detergent), occasionally drying it off with a towel to see what the surface looks like underneath. This is where you will get to sand out all of those alarming dust bits and bug parts that you thought had ruined your paint. You’ll be amazed how a bit of sanding can make up for imperfect booth conditions, and/or even to remove a nasty run. You will be looking for a continuous mat surface.. any shiny spots remaining means you haven’t sanded enough.
Next, proceed to 2000 grit sandpaper to remove any sanding marks from the previous process. This step should go pretty quickly. Finally, I used 3M 3000 grit wet sand padded disks in my air powered D/A for the final sanding process. These disks are VERY expensive.. $5.00, $75 for a pack of 15. And, I found each disk was only good for about a 2′ x 2′ area before wearing out. I used 7 or 8 disks just for the roof alone, but, believe me, at this point, you’ll pay just about anything to avoid additional labor! These disks are incredible, and fine enough that there is little concern of “burning through” your clearcoat (perish the thought). When you are finished, the resulting paint surface is almost smooth and shiny enough to avoid much further work. However, you’re not quite done yet.
Using a wool pad on a 7″ variable speed polisher (I set the speed near the low end of the range), go over the surface with a good 3M medium cut machine compound. You will notice I use the 3M products almost exclusively. I’ve had great results with their polishing pads and bonnets, respirators, rubbing compounds and machine polish. All is expensive, but the results are well worth it, and you’ll find 3M products in most all professional shops. An added bonus is that all these products are available on Amazon, and carried as well at most local auto paint suppliers.
The final step (for now) is use of 3M Perfect-It Machine Polish, using, this time, a 3M foam pad on your machine polisher. This step will proceed quickly, and you will be stunned by the final results!
All that is left now is to reassemble the body bits, and enjoy your handiwork. After 4-6 weeks of curing, you can apply a nice coat of final wax to protect your pride and joy.
When all was said and done, I spent around $1,000 for paint and prep materials, to complete a job that would have cost $6,000 – $8,000 at a quality shop. At final count, the individual paint steps numbers 10 separate applications, and that is considered the absolute minimum to do the job right. Yes, an amateur CAN achieve professional results by following directions, and exerting a lot of elbow grease!
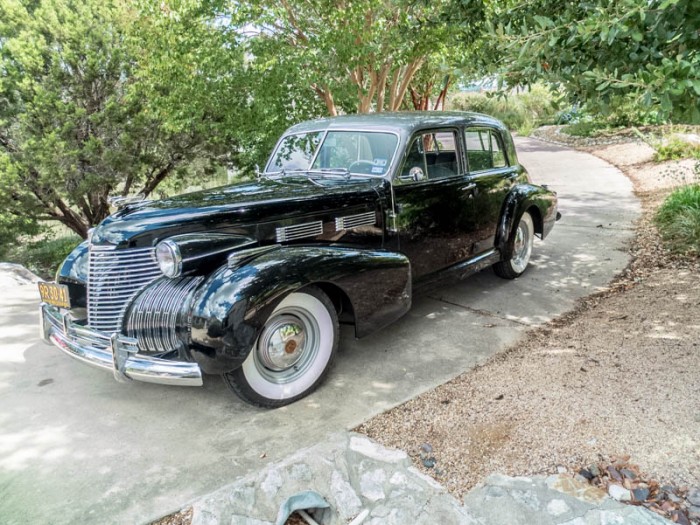
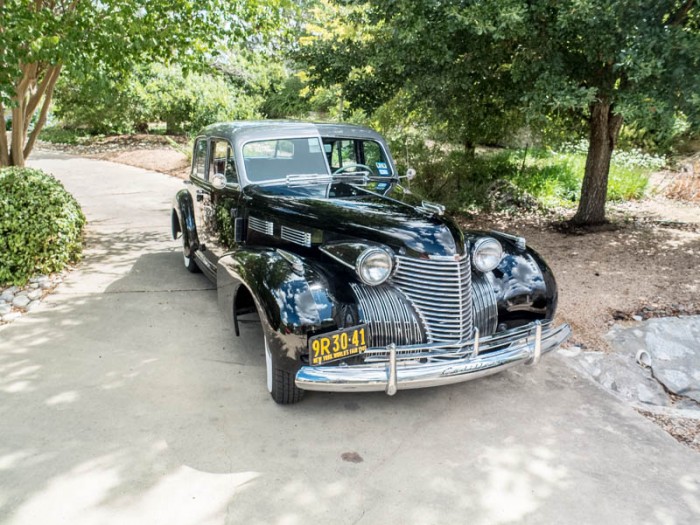



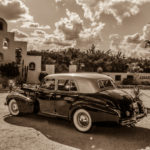
I actually saw the result at the rolling sculpture. Show in bee caves It looked great