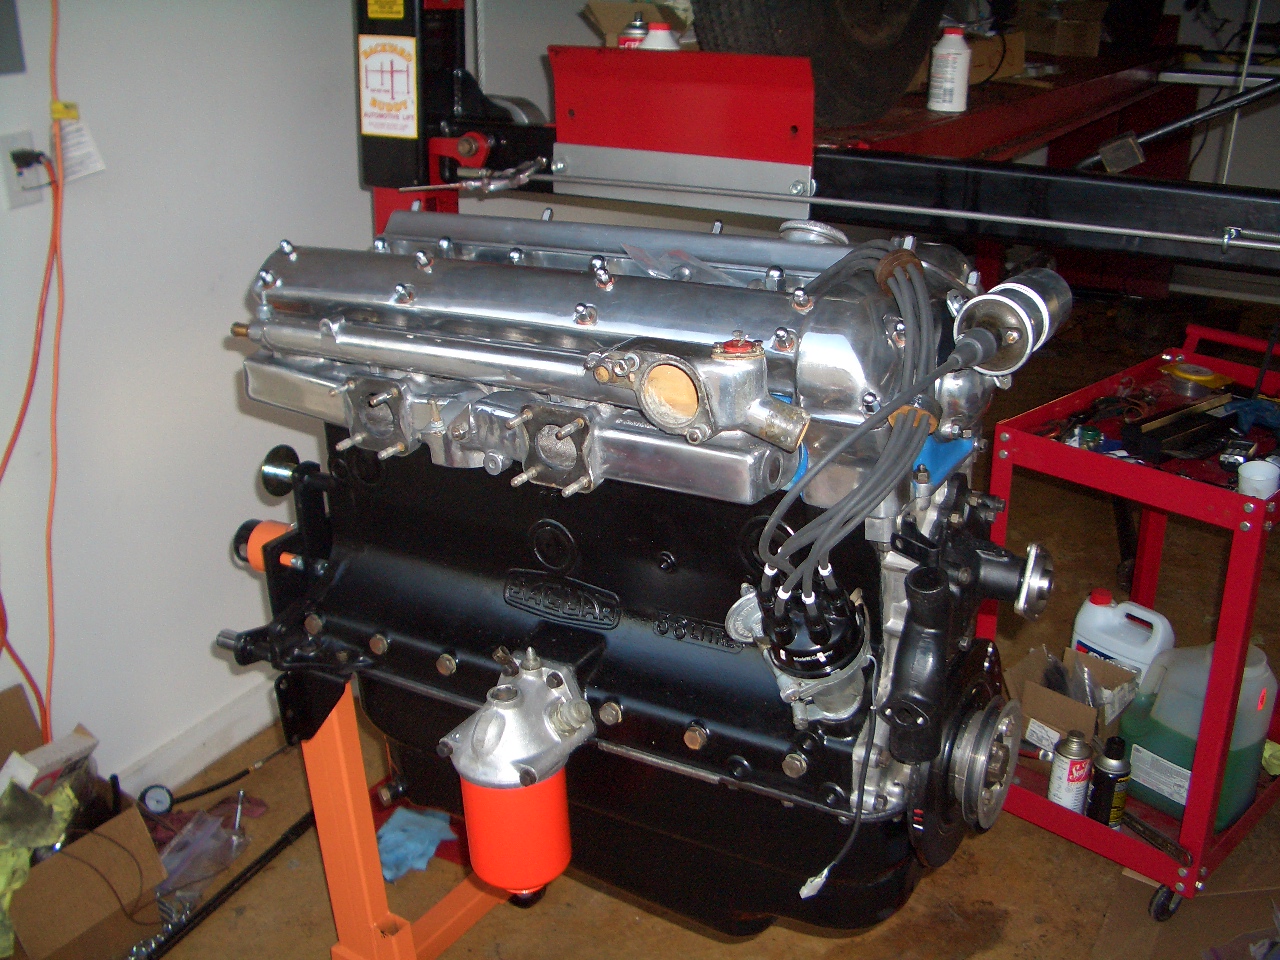
It is always good to have the right equipment to effect a proper repair. Our old Bridgeport-style milling machine came to the rescue last month when my friend Dean approached me with a problem with his beautiful Jaguar MK II Saloon.
It seems that Jaguar, in its infinite wisdom, designed the engine compartment of these early 60’s era cars so tightly that was no room left up front for more than a single drive groove on the crank pulley. When Jaguar later introduced power steering as an option to their cars, there was literally no room to mount a power steering pump, given the cross-flow head, which fills the right side of the engine compartment with a pair (or more) of SU carburetors, and the left-side which is reserved for the dual exhaust manifold system.
Jaguar’s brilliant solution was to design a generator with a drive dog on the aft end, to which the power steering pump could be grafted onto. Hence, the single V belt drove the water pump, generator, and power steering pump.
As later owners (especially those in Texas) hankered for air conditioning on these classics, a Texas supplier of an aftermarket A/C system designed an alternator with a similar rear-drive dog to accept the original power steering pump, thus preserving the original functionality of the single belt system.
The concept was a good one, however, the new “improved” system omitted the rubber-mounted drive piece that Jaguar used initially in the interface, opting, instead, for a direct, metal-to-metal contact of the driving and driven parts.
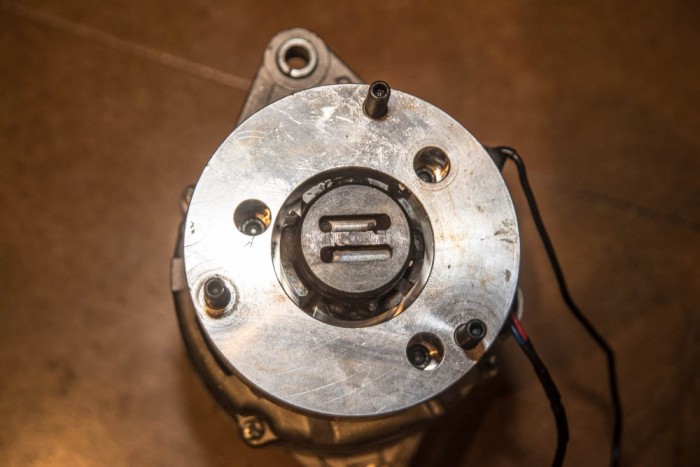
When Dean’s power steering assist abruptly went south during a drive, he removed the pump to investigate. What he found was somewhat astounding: The pump mating coupler on the alternator should have looked something like this with a solid bar in the center against which the mirror-image coupler from the pump should mate:
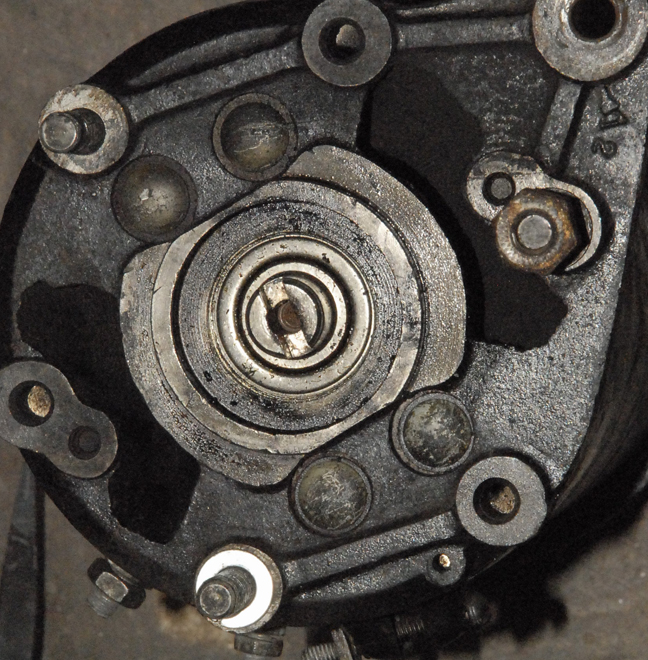
Instead, he found that coupling, over time, had completely worn through, allowing the pump coupler to just spin “freely” in between:
You can see how the opposing, mating piece had even worn into the sides of the slotted housing.
Unfortunately, this piece is no longer available as a separate part, so Dean was faced with either shelling out some $600 for a new alternator, or attempting to repair the original.
I reluctantly (only because of my limited experience with something like this) agreed to take a shot at this repair. The plan would be to:
- Clamp the drive adapter in the milling machine and remove that last remaining piece of metal in the center
- TIG weld new metal to replace that entire center bar that had been worn away
- Again use the milling machine to mill new 1/4″ slots in the piece, restoring the configuration to original
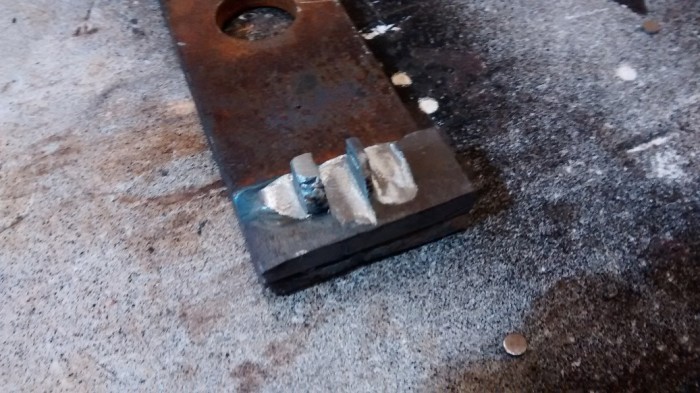
I began by making a test weld to similar height on a piece of bar stock, just to confirm that the TIG-welded metal would not be too hard to machine, and then by machining “practice” grooves to prove out the process:
That process seemed to go well, so I took a deep breath, knowing that any false move either with the TIG or the milling machine could render Dean’s $600 alternator into a high-priced doorstop!
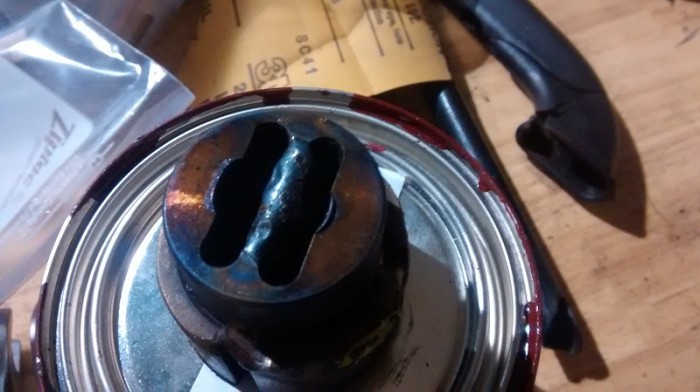
Next, I carefully TIG welded metal to fill the center bar section of the coupling:
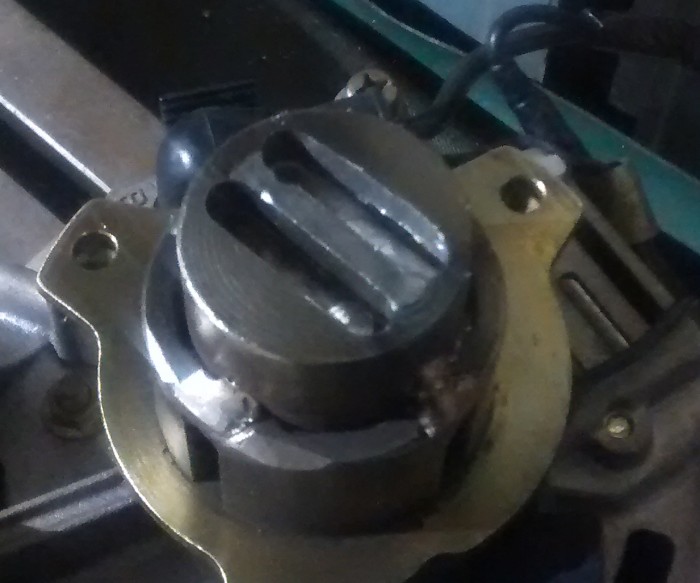
Afterwards, the piece was chucked into the milling machine, the top surface milled flat, and the grooves milled back in on each side.
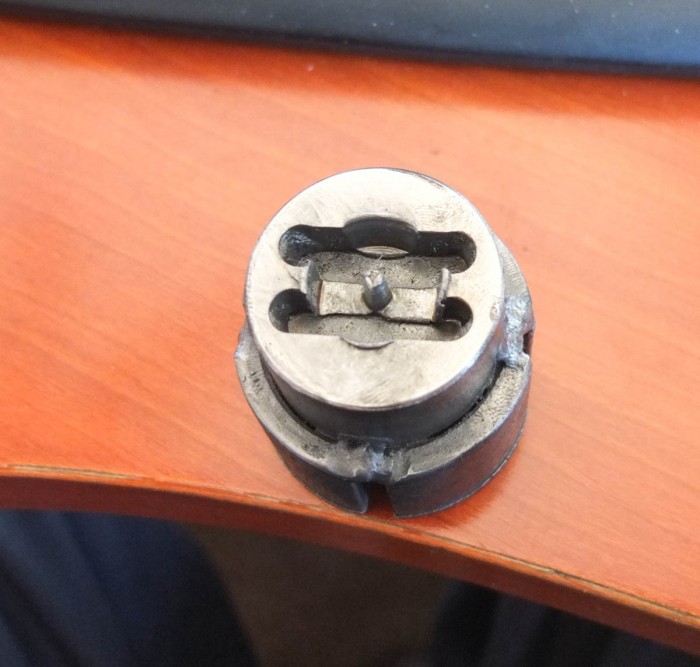
To my relief, the finished result turned out well, Dean reassembled his pump and alternator assembly, and at last report, it is still working perfectly:





nice job, great when a plan comes together, fixin old cars sometimes(maybe a lot of times ), you gotta improvise!